Make Your Own Stickers

We picked up a Xyron Create a Sticker Machine at our local craft resale shop, along with a refill cartridge
for just a couple bucks. Thrift store score!
The sticker maker machine is actually incredibly affordable (i.e. under $6!), so if this project appeals to you at all, I recommend picking one up! We’ve been using ours every day since we bought it.
Here’s how we made our own stickers:

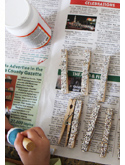
We used plain construction paper, colored pencils and our Winnie the Pooh stamps, also scored from a thrift store. These stamps may look old and well-loved, but I’m thrilled we found them as I have been unable to find similar ones anywhere.

We stamped different Hundred Acre Wood characters onto plain paper, then filled in (over!) the outlines with colored pencils.

After cutting out the stamp shapes, we fed them through the sticker maker, peeled off the front and back of the tape, and voilà! We have a personalized Piglet sticker! Our little girl was thrilled.

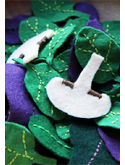
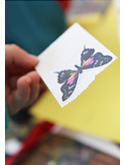
We’ve also made butterfly clip art and colored shape stickers cut from construction paper.


The possibilities with this sticker maker are endless!
We used these beautiful handmade stickers on some of the thank you notes from our birthday festivities. A handmade-touch to the cards and a super fun project!

1 Comment
RSS feed for comments on this post.
Sorry, the comment form is closed at this time.


Does it laminate the picture w/a sticky back? When it comes out do you have to cut it out?
Comment by Mom — February 8, 2011