
I wanted to embroider something special to hang with the “create” felt banner I made for above the desk in our daughter’s new big girl room (similar to the “sweet dreams” felt banner above her bed).

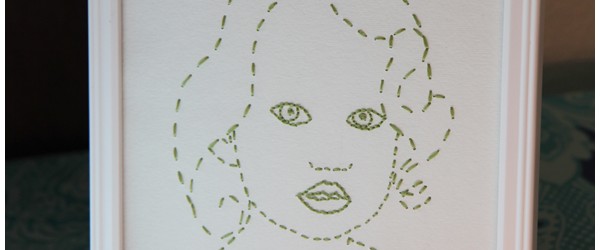
I read about a portrait embroidery project in Country Living Magazine and couldn’t wait to try it. After printing out the photo that I would use as a template, I drew in pencil on the photo where I planned to embroider. I’m glad I used pencil because I drew and redrew the lines until I felt confident with the outline placement.

Then I taped the photo template to watercolor paper with scotch tape, placed it on top of some thick cardboard and used a thumb tack to punch holes into the watercolor paper to embroider. (See the Country Magazine link above for the complete directions).

Framed and ready to hang above her desk
I was nervous that the picture wouldn’t look like her, but I’m quite pleased with the final result. In fact, I like her embroidered portrait so much that I’m toying with the idea of making a family portrait for our bedroom.

Meanwhile, our daughter is busy embroidering a picture of her own design. I love it when inspiration hits!
i LOVE it! i want to try one.. i’m thinking chris would find it weird if i did ones of the cats, though… :)
THAT is really cool! I see how you chose only certain places to outline (for example, your decision on the outline for Miss Leyba’s lovely nose). Yours came out splendidly! I think I’d have a tough time figuring out how to manage the outlines — any tips on what you tried?
that’s really cool!
what a lovely idea–thanks for sharing. and yours turned out wonderfully! i MUST make some!