Yarn Cone Holiday Trees Craft Project
No surprise that our craft projects have been taking a holiday spin lately. Today we’ll share a simple kids holiday tree project.
Note that this a messy project (lots of glitter!) and takes several days to complete (because of all the layers that need to dry)… You have been forewarned!

We started with these free empty yarn cones, picked up at a local craft resale shop (that benefits our town’s senior center).

We painted the yarn cones with crayola washable paint in green and purple. (Because doesn’t purple just scream holidays?! Miss Leyba thinks so and I quite agree with her.) Please learn from my experience and don’t use washable paint. We used it simply because cause a toddler was involved, but the paint was somewhat thin.

I only got a second coat on half of the cones (impatient toddler and who has time for second coats these days anyhow?!), so you can tell from the photos which ones received just one coat of paint. Regardless I think they turned out just fine. We’re all about the process versus the product here in Spritzer Leyba Land.

After letting the cones thoroughly dry, we used craft glue to made patterns on the trees and then covered them with glitter. For our first coat, we used green glitter (also from the craft reuse shop).

We then added patterns with glue and silver glitter, after the layer of green glitter thoroughly dried.

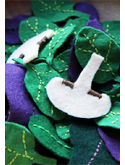
We glued on embellishments. We used silver stars, but you could easily use buttons, mirrors, felt pieces, dried flowers or leaves (and turn it into a fall craft, rather than a winter holiday craft).

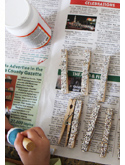
I zig-zagged glue and then rolled a cone, shown below, in the glitter on our newspaper for a more tree-boughs-covered-in-snow sort of look. (Who knows if I was successful but it was fun!)

Here are our three trees drying:

We then covered them with mod podge to seal the glitter on and to add a gloss finish to the trees.
Here’s when I thought I messed up and that the trees would be snow covered if the mod podge stayed white and didn’t dry clear (pardon the harsh lighting):


Imagine my relief when I found them the next morning, all glossy and dry, with no hints of white left over.

Phew!
Now to store them in a safe spot until December…
2 Comments
RSS feed for comments on this post.
Sorry, the comment form is closed at this time.


I love love love her smock!
Comment by Laura — November 9, 2010
They are lovely. Bravo ! :)
Comment by Isa — November 13, 2010